
The Raspberry Pi is a versatile and affordable mini-computer that has become popular among enthusiasts and professionals alike. With its small size and low power consumption, the Raspberry Pi can be used for a wide range of projects, from simple home automation to complex robotics. One of the most useful features of the Raspberry Pi is its ability to operate in USB gadget mode, which allows it to act as a USB device and connect to a host computer using a USB cable. This feature can be particularly useful for remote access via SSH, allowing you to connect to your Raspberry Pi from your computer without needing an Ethernet or Wi-Fi connection. In this article, I will walk you through the steps to set up your Raspberry Pi for USB gadget mode, so you can easily use it as a portable linux machine as an easy development setup.
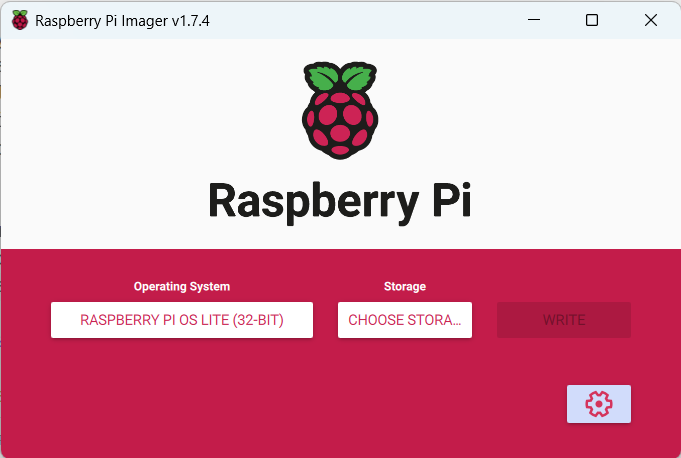
Load OS-Image on SD-Card using Raspberry Pi Imager
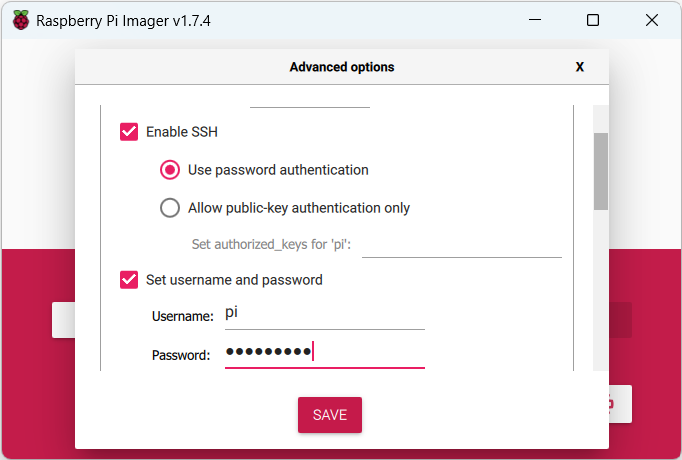
The newest Raspbian images don't come with the standard user "pi" anymore (Blog post). Thats why it's easiest to use Raspberry Pi Imager. It can set up a standard user and enable ssh right from the start.
Prepare files on SD-Card for USB Gadget mode
Append line to config.txt
dtoverlay=dwc2
If this file contains otg_mode=1, comment it out using a '#'.
# otg_mode=1
Add to cmdline.txt after rootwait (file content is in a single line, parameters are deliminated by space).
modules-load=dwc2,g_ether
Example cmdline.txt file after edit:
console=serial0,115200 console=tty1 root=PARTUUID=34f4435e-02 rootfstype=ext4 fsck.repair=yes rootwait modules-load=dwc2,g_ether quiet init=/usr/lib/raspberrypi-sys-mods/firstboot systemd.run=/boot/firstrun.sh systemd.run_success_action=reboot systemd.unit=kernel-command-line.target
Windows 11 specific
Install Bonjour
The Bonjour Print Services for Windows are needed to resolve the .local host adress of the Raspberry Pi. The program can be downloaded from here.
Install Windows RNDIS Driver
Follow this page for instructions.
Optional: share network
You can share your network connection from the Windows Host to the Raspberry Pi by going to Control Panel\Network and Internet\Network Connections.
First, you need to identify the Rasbperry Pi Network Adapter by searching for USB Ethernet/RNDIS Gadget and remember the name of the adapter (you can also change it). Next, right click on the network you want to share, go to properties and then sharing.
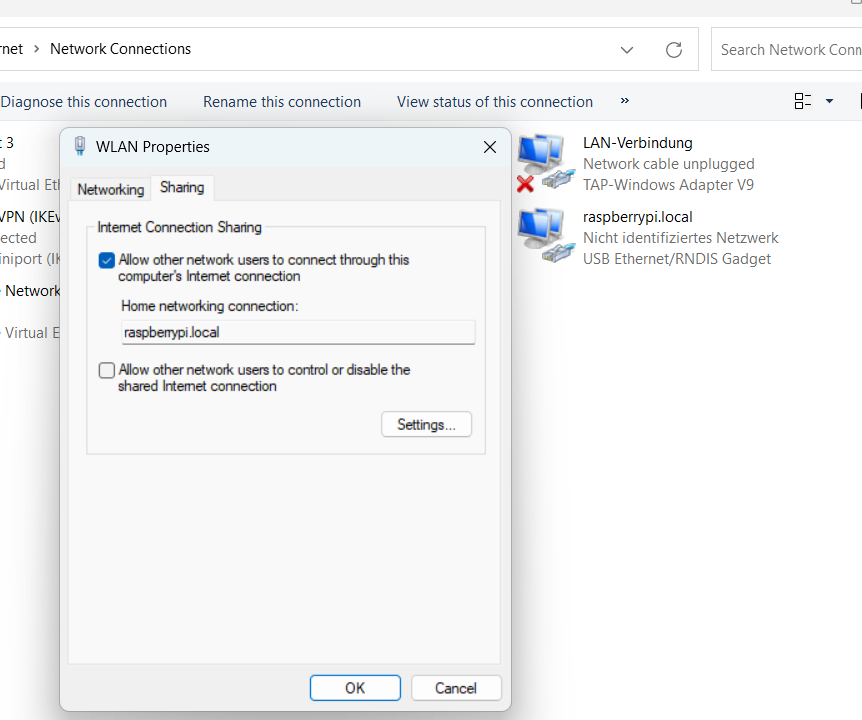
Select Allow other network users to connect through this computer's Internet connection and enter the Raspberry Pi Adapter name for Home network connection.
SSH
After this, you should be able to ssh onto the raspberry pi with
ssh pi@raspberrypi.local
Optional: passwordless ssh
Currently, the OpenSSH client in Windows 11 does not support the ssh-copy-id command. Nevertheless, a PowerShell command in a single line can imitate the ssh-copy-id command and permit you to transfer an SSH public key created by the ssh-keygen command to a Linux device located remotely, enabling login without a password.
type $env:USERPROFILE\.ssh\id_rsa.pub | ssh pi@raspberrypi.local "cat >> .ssh/authorized_keys"
Replace id_rsa.pub with your public key and pi@raspberrypi.local with your username and host name or ip-address.
If you are getting an error doing this, you may need to create the .ssh directory first by entering
ssh pi@raspberrypi.local "mkdir ~/.ssh"
into your Powershell.